
A downloadable risk assessment plan template is your starting point for moving safety management from guesswork to a practical, documented system. It provides a structured framework to identify, analyse, and control workplace hazards. This is non-negotiable in high-risk sectors like construction and manufacturing where improvising is not an option.
Why A Standard Risk Assessment Plan Is Essential
In industries like construction and manufacturing, daily operations are packed with potential hazards. Trying to manage safety on the fly without a documented plan isn't just inefficient; it's a massive business liability. A standardised risk assessment plan gives you a consistent method for evaluating and controlling these dangers across every single project and team.
This is not about creating more paperwork for the sake of it. It’s about building a real-world tool that protects your team and your business from predictable and preventable incidents. When something does go wrong, a well-documented plan is your proof of due diligence, which is critical for both compliance and keeping the doors open.
The Real Costs of Poor Planning
Let's be blunt: the consequences of neglecting a formal risk assessment process are severe. We're talking about huge financial hits and, more importantly, a real human cost. The numbers in Australia paint a stark picture for high-risk industries.
Over the last decade, more than 1,850 workers have died from traumatic injuries in Australian workplaces, and over 1,140,000 workers have suffered serious claims. On top of the human tragedy, businesses face hefty fines, up to $1.5 million for corporations under the Work Health and Safety Act. You can see the full statistics on workplace safety from Safe Work Australia.
These figures are not just statistics; they represent a direct threat to your people and your bottom line. An incident does not just halt a project; it can trigger investigations, legal action, and cause lasting damage to your company's reputation.
Moving Beyond a Tick-Box Exercise
A risk assessment plan is only effective when it becomes a living part of your workflow, a document your team actually uses and understands.
Here’s what a good plan really does for you:
- Provides Consistency: It makes sure every team, whether they're on the factory floor or a construction site, is assessing risks using the same clear criteria.
- Creates Clarity: It documents what the hazards are, who is responsible for managing them, and exactly what control measures are in place. No more grey areas.
- Supports Compliance: It offers clear, tangible evidence to regulators that you are proactively managing your workplace health and safety obligations.
- Improves Decision-Making: It gives Operations Managers and business owners the hard data they need to put resources where they'll have the biggest impact on the most critical risks.
A solid template helps you methodically work through the entire risk assessment process, from spotting a potential hazard like an unguarded machine to implementing and monitoring the right controls. It transforms safety from a reactive chore into a proactive business function that helps you stop problems before they turn into incidents.
How To Make This Risk Assessment Template Your Own
A blank risk assessment plan is a decent starting point, but its real power is unlocked when you shape it to fit your actual worksite. A generic document just ticks a compliance box; a customised one genuinely prevents injuries.
You can grab the template right now and follow along as we break it down:
- Download in Microsoft Word Format
- Make a Copy in Google Docs
Once you have your copy open, you’ll see it’s laid out into a few key sections. Let's walk through what each part means and, more importantly, how you should be filling it out.
A Quick Look at the Template Fields
This template is designed for clarity, not complexity. It walks you through a logical sequence, from spotting a hazard to making sure it’s been properly controlled.
Here’s a snapshot of the main columns you'll be working with.
As you can see, the structure is straightforward: identify the hazard, analyse the risk, detail the controls you'll use, and assign responsibility. This layout is designed to make sure nothing important gets missed.
Each field builds on the last one. You can't figure out the right control measures, for example, until you've properly identified the specific hazard and thought about how likely it is to cause harm. This step-by-step logic is what turns the document from a piece of paperwork into a practical safety tool.
Making the Template Work for Your Site
Let's be honest, every workplace is unique. A multi-level construction project in a busy city centre has completely different challenges than a self-contained manufacturing plant. Your template has to reflect your reality.
For a Construction Site:
- Subcontractor Activities: It's a good idea to add columns to track the risks from different trades working on top of each other. Think about the specific risks of welders working above painters or scaffolders working near live electrical services. Document them.
- Site Access and Egress: Your plan needs to detail hazards related to delivery vehicle routes, public access points, and pedestrian walkways, all of which can change as the project moves forward.
- Dynamic Conditions: Construction sites change daily. Customise your template with a 'Date Observed' field and a 'Status' column (e.g., 'Open', 'Under Review', 'Closed') to track hazards as they pop up and get resolved.
For a Manufacturing Plant:
- Specific Machinery: Don't just list 'machinery' as a hazard. Get specific. List the exact equipment, like 'CNC Lathe #3' or 'Conveyor Belt System B'. This precision is what makes your controls effective.
- Shift Handovers: Add a field to note which shift identified the risk and who is responsible for communicating it at handover. A surprising number of incidents happen simply because information gets lost between shifts.
- Material Handling: Tailor your hazard categories to your operations. Include specifics like 'chemical storage zones', 'forklift charging stations', or 'manual handling of heavy components'.
The key takeaway here is to be specific. A risk assessment for "working at heights" is okay, but one for "installing trusses on level 3, north-west corner, with temporary scaffolding" is far more effective. It reflects a real, on-the-ground task that people can actually visualise and plan for.
The goal is to create a living document that someone can pick up and immediately understand the specific dangers of your workplace. For a highly structured approach to documenting issues in building disputes, you can master the NCAT Scott Schedule template, which shows just how powerful detail-oriented documentation can be. Your risk assessment plan needs that same level of site-specific detail to be truly effective.
Getting Your Risk Assessment Plan Right
A risk assessment plan template is a great start, but it’s only as good as the information you put into it. Accurate, specific details are what turn a tick-box exercise into a practical tool that genuinely keeps your worksite safer.
Let's walk through how to fill it out properly, focusing on the core process: spotting hazards, analysing the risk they pose, and putting the right controls in place.
It's a logical flow. You start by finding what could go wrong, figure out how bad it could be, and then put measures in place to stop it from happening.
This simple visual breaks down the three key stages.
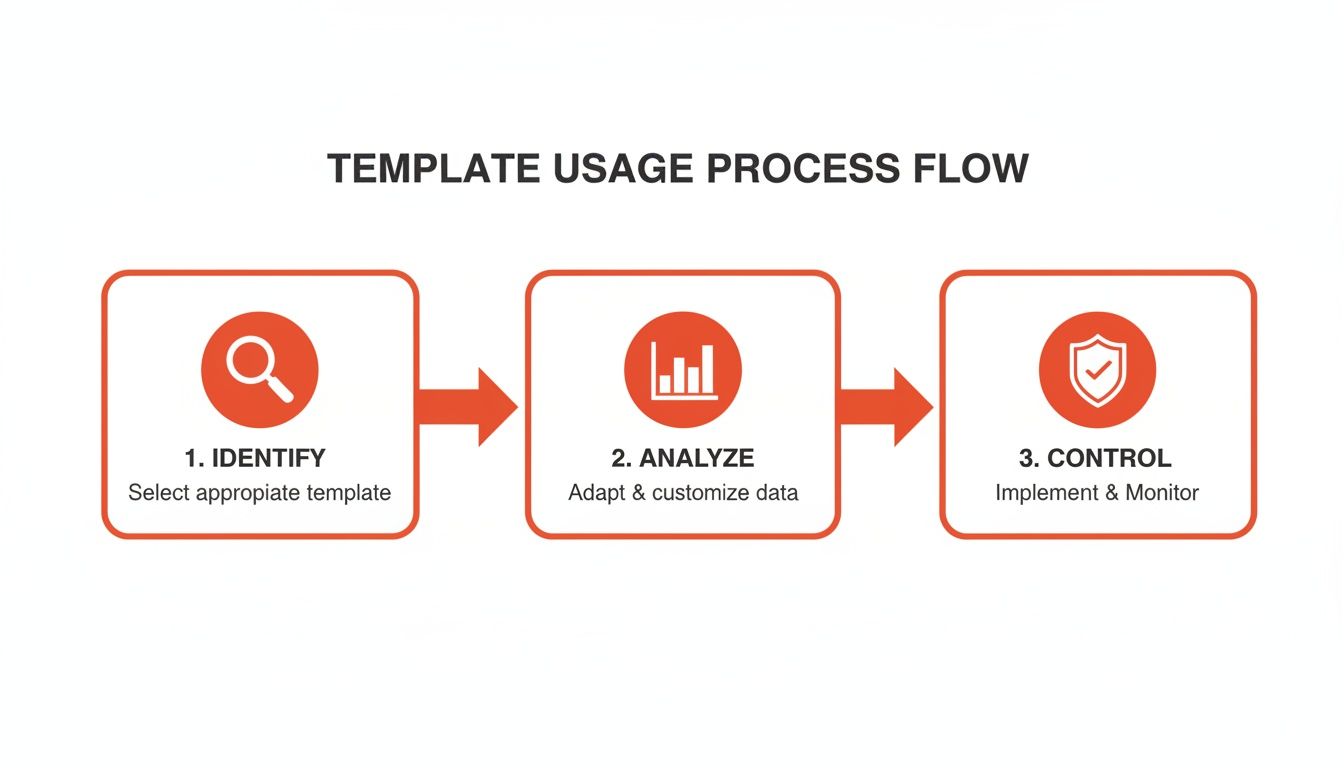
As you can see, moving from identification to analysis and then to control is a direct path. Following it ensures you don't miss any critical steps when you're documenting risks on site.
Looking Beyond the Obvious Dangers
The first part, Hazard Identification, is about more than just listing the stuff that’s obviously dangerous. It means taking a proper look at your work environment, your processes, and even your people.
Don't just do a site walk. Actually talk to the people doing the work. They're the ones who know about the near-misses and tricky situations that managers might never see.
To get you started, think about hazards in these buckets:
- Physical Hazards: This is the most common stuff. Think unguarded machinery, working at heights, dodgy electrical leads, excessive noise, and simple slip or trip hazards.
- Process Hazards: These are all about how a job is done. This could be anything from manual handling of heavy gear and repetitive tasks causing strain, to complex procedures that could easily go wrong under pressure.
- Chemical Hazards: This covers everything from cleaning agents to industrial solvents. Are they stored correctly? Is the right personal protective equipment (PPE) being used? Is there enough ventilation?
It's easy to just write "forklift" as a hazard. A much better, more actionable entry is "forklift operating in a shared pedestrian walkway during peak shift changeover." Being specific is crucial because it points you directly toward a real solution.
How to Score Risks with a Matrix
Once you’ve got your list of hazards, you need to analyse them to figure out which ones need your attention first. This is where risk scoring comes in, and it boils down to two simple factors: likelihood (how likely is it to happen?) and consequence (how bad will it be if it does?).
A simple risk matrix is the best way to visualise this and prioritise your efforts. You can use this table to quickly get a feel for the risk level. Just find where the likelihood and consequence intersect.
Simple Risk Scoring Matrix
| Likelihood | Consequence Minor | Consequence Moderate | Consequence Major | Consequence Catastrophic |
|---|---|---|---|---|
| Almost Certain | Medium | High | Extreme | Extreme |
| Likely | Medium | High | High | Extreme |
| Possible | Low | Medium | High | Extreme |
| Unlikely | Low | Low | Medium | High |
| Rare | Low | Low | Low | Medium |
For a more detailed score, you can assign numbers. For example, rate 'Likelihood' from 1 (Rare) to 5 (Almost Certain) and 'Consequence' from 1 (Minor) to 5 (Catastrophic). Multiplying them gives you a risk rating.
A risk scoring 25 (Almost Certain x Catastrophic) demands immediate, decisive action. On the other hand, a risk scoring 1 (Rare x Minor) can probably be managed with your routine procedures. This simple system takes the guesswork out of it and helps you put your resources where they’ll make the biggest difference.
Choosing and Documenting Your Controls
After scoring your risks, the next move is to decide how you’re going to control them. This is not about picking the cheapest or easiest fix; it's about choosing the most effective one. The Hierarchy of Controls is the industry-standard framework for this, ranking controls from best to worst.
Here’s how it breaks down, in order of effectiveness:
- Elimination: The best option. Physically remove the hazard altogether. Can you design out the need for working at height in the first place?
- Substitution: Replace the hazard with something safer. A classic example is switching to a less toxic chemical.
- Engineering Controls: Isolate people from the hazard. This is where things like machine guards, exhaust ventilation, or safety barriers come in.
- Administrative Controls: Change the way people work. This means creating safe work procedures, rotating jobs to reduce exposure, or beefing up your training.
- Personal Protective Equipment (PPE): This is your last line of defence. Think hard hats, gloves, and respirators. PPE should never be your only control if a better option is available.
When you fill out your template, document the specific controls you’ve chosen. Don't just write "use PPE." Instead, get detailed: "All personnel must wear high-visibility vests, steel-capped boots, and safety glasses when within 10 metres of the operating excavator." This level of detail makes your expectations crystal clear and easy to follow.
Putting It All Together: A Practical Example
Let's run through a common scenario you might find in a manufacturing plant.
- Hazard Identification: An operator's hand could get caught in the rotating gears of a conveyor belt drive system, which currently has a damaged guard.
- Risk Analysis:
- Likelihood: An incident is Possible (3) because the machine is used every day and the guard is busted.
- Consequence: The outcome would be Major (4), likely resulting in amputation or another severe injury.
- Risk Score: 3 x 4 = 12 (High Risk). This needs to be sorted out, fast.
- Control Measures:
- Immediate (Engineering): Immediately lock out and tag out the machine until the guard is properly repaired or replaced. No arguments.
- Long-term (Engineering): Install an interlocked guard that automatically shuts the machine down if it's opened.
- Administrative: Update the safe work procedure to include a pre-start check of all machine guards. Follow that up with a toolbox talk for all operators on the new procedure.
By following these practical steps, your risk assessment plan becomes a genuinely useful document. It clearly outlines the dangers and, more importantly, the concrete actions you’re taking to manage them. This detailed, hands-on approach is what makes a safety plan truly effective.
Theory is one thing, but seeing how a risk assessment actually works in the real world is another. To bring it all to life, I’ve put together a couple of examples based on common, everyday scenarios.
These are not just academic exercises. They show you exactly how to take the chaos of a worksite and translate it into a clear, structured, and genuinely useful document.
First, we'll look at a residential construction site, specifically the headache of keeping multiple subcontractors safe. Then, we’ll switch gears to a manufacturing firm and look at risks from automated machinery and, just as importantly, some of the less obvious threats.
Example 1: Residential Construction and Subcontractor Management
On any residential build, one of the biggest challenges is managing different trades working on top of each other. This completed risk assessment plan template zeroes in on a classic scenario: a roofing subcontractor working at height while other teams are busy on the ground below.
Here’s a snapshot of what a properly detailed entry looks like.
This example gets into the specifics. It doesn't just say "working at height." It defines the exact task, identifies everyone at risk (both the roofers and the ground crew), and then outlines a clear, layered set of controls.
Key Takeaway: Notice how the controls follow the hierarchy of controls. It kicks off with an engineering control (edge protection), then adds administrative controls (exclusion zones, toolbox talks), and finally, PPE as the last line of defence. That's what a robust and compliant approach looks like.
Example 2: Manufacturing Firm and Automated Machinery
Now, let's step inside a manufacturing plant. This example tackles a common risk: an operator dealing with an automated packaging machine during a maintenance task, like clearing a jam.
It also touches on an operational risk that’s becoming more critical by the day.
- Hazard Identification: An operator's arm could be caught by the machine's robotic arm while clearing a jam. We know the standard lockout-tagout (LOTO) procedure isn't always followed when production targets are tight.
- Risk Analysis:
- Likelihood: Possible. Training is in place, but pressure to hit targets means operators sometimes take shortcuts. An incident is definitely foreseeable.
- Consequence: Major. Getting tangled up with this machine would almost certainly lead to severe crush injuries, maybe even an amputation.
- Risk Score: High. This isn't something a simple reminder can fix. It needs immediate, solid controls.
- Control Measures:
- Primary Control (Engineering): Install a fixed perimeter guard with an interlock gate. The moment that gate opens, the machine automatically powers down. This makes it physically impossible for an operator to access moving parts while the machine has power.
- Secondary Control (Administrative): The safe work procedure needs to be updated to include the new interlock system. We'll run a mandatory training session for all operators and maintenance staff to show them the new guard and reinforce LOTO protocols for any non-routine work.
- Monitoring: The shift supervisor is now responsible for doing weekly spot-checks to make sure the interlock gate hasn't been bypassed or tampered with.
Expanding the Scope to Non-Physical Risks
A modern risk assessment can't stop at what you can see and touch. Operational and digital threats are now front and centre for any business.
Cyber risk has shot up to become a top threat for Australian organisations, which means any decent risk assessment plan template absolutely must include these digital weak points. In fact, Aon’s 2023 Global Risk Management Survey ranked cyber incidents as the number one risk.
For a Plant Manager, this means looking beyond physical hazards. You have to assess the risk of a data breach in the very systems that control your multi-site operations. With cyber breaches costing Australian businesses a staggering $33 billion each year, you just can't afford to ignore them. You can read more about Aon's findings directly on their site.
Here’s what that might look like in our manufacturing example:
- Hazard Identification: Unauthorised access to the plant's control system (SCADA) could cause machinery to malfunction or shut down production entirely.
- Risk Analysis:
- Likelihood: Unlikely. The system has a firewall, but we're seeing more phishing attempts targeted at our staff.
- Consequence: Catastrophic. A shutdown could mean hundreds of thousands in lost production and could even cause physical damage to the equipment.
- Risk Score: High. Even though the likelihood is low, the potential damage is so massive that this has to be a priority.
- Control Measures:
- Technical Controls: Implement multi-factor authentication for anyone accessing the control system remotely. Ensure all software is patched and kept up-to-date.
- Administrative Controls: Run mandatory annual cybersecurity training for all staff with system access, with a sharp focus on how to spot phishing emails. Limit who has system access to only those who absolutely need it.
These examples should give you a clear blueprint to follow. For more ideas, have a look at these 8 practical examples of fire risk assessments to see how different risks are documented. To keep building out your own library, you might also find these other risk register samples we’ve put together useful.
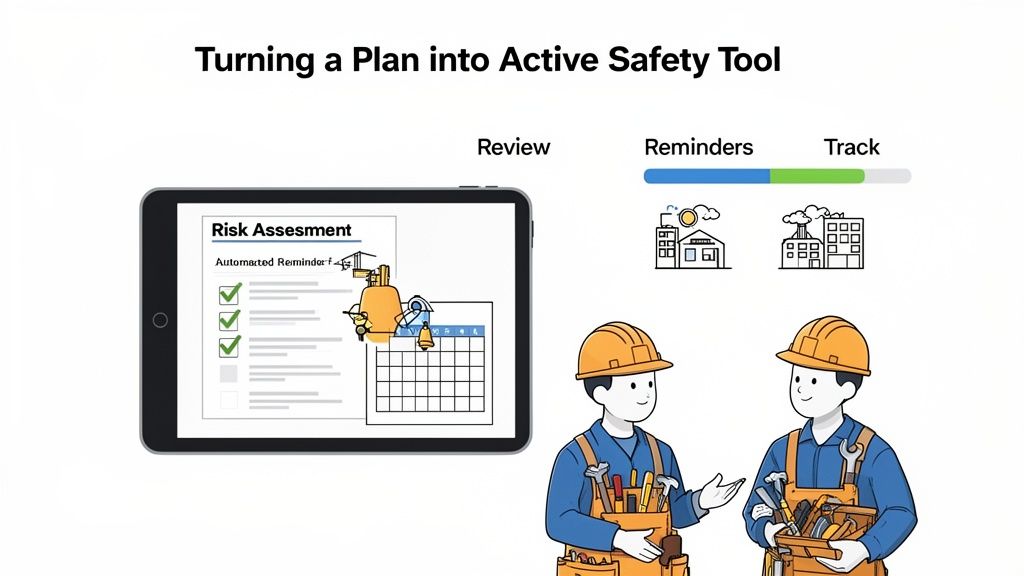
Turning Your Plan Into An Active Safety Tool
You’ve finished the risk assessment plan. Great. But that’s actually where the real work begins.
A plan that sits in a folder collecting dust is completely useless. To make it a practical, on-the-ground safety tool, you have to weave it into the daily rhythm of your operations. The goal is to turn it from a static document into a living guide your team actually uses.
Stop thinking of the plan as a one-off task. It needs to become a dynamic part of your workflow, with regular check-ins and a central role in your team's safety conversations, not just an afterthought.
Scheduling And Assigning Regular Reviews
Your worksite changes constantly. New gear arrives, processes get updated, and fresh faces join the crew. A plan that was spot-on last month could have serious gaps today. That’s why building a review schedule is non-negotiable.
Set a firm schedule for reviewing your plan:
- Quarterly Reviews: This is a good baseline for a general check-up. Are your current controls still effective? Are they even relevant anymore?
- Post-Incident Reviews: This one is critical. After any incident or near-miss, your very first step should be to pull out the plan and pinpoint what went wrong.
- Change-Triggered Reviews: Bringing in a new machine, a different chemical, or changing up a work procedure? Review the plan immediately.
Assigning clear responsibility is just as important as scheduling. Don't just say "management will review it." Name a specific person, the Site Supervisor, the Plant Manager, who is accountable for making sure these reviews happen. Accountability is what drives action.
Making It Part of Your Toolbox Talks
Toolbox talks are the perfect place to bring your risk assessment plan to life for the people on the front line.
Instead of vague safety reminders, use your plan to steer the conversation. Pick a specific, high-risk task from your assessment that’s relevant to the week's work.
For instance, pull a single line item like "Operating the scissor lift near overhead power lines." Talk through the risks you’ve identified and walk through the specific control measures you documented. This makes the plan tangible and shows your team how it directly connects to their daily jobs. It also opens up a feedback loop where workers can tell you if a control is actually practical or needs a tweak.
Using A Platform For Real Accountability
Trying to manage this whole process with paper or spreadsheets across multiple sites is a fast track to failure. It’s just not scalable.
This is where a platform like Safety Space makes a massive difference. You can upload your completed risk assessment plan template directly into the system.
Once it's in there, you can:
- Set automated reminders for your scheduled reviews so nothing ever gets missed.
- Assign specific control checks to individuals and see their completion status in real-time.
- Get a live view of your risk profile across every single project or site, creating a clear line of accountability.
This approach locks your plan into real-world actions, ensuring controls are consistently implemented and monitored.
Your plan also needs to be dynamic enough to tackle new threats as they pop up. Take climate risks, for example, which are reshaping safety needs for Australian industrial firms. A recent report flagged 11 priority risks for critical infrastructure, with a staggering 41% of Australians impacted by disasters in 2023 alone.
Integrating your plan into a digital system means you can quickly update it to handle emerging, climate-driven disruptions like floods and heatwaves. Our guide on control measures for risks has more practical advice on getting this right.
Got Questions? We’ve Got Answers
Even the best template is going to spark a few questions. It’s only natural. Here are some of the most common ones we hear, with straight-up answers to help you get the practical side of risk assessments right.
How Often Should We Review Our Risk Assessment Plan?
You should be looking at your risk assessment plan at least once a year. That’s the bare minimum.
But really, you need to dust it off anytime something significant changes in the workplace. This could be bringing in new machinery, switching up a work process, or right after an incident or even a near-miss. The goal is to keep the plan alive and relevant to what your team actually faces day-to-day. A plan that just sits on a shelf is a waste of paper.
What Is the Difference Between a Hazard and a Risk?
This one trips people up all the time, but the difference is actually pretty simple when you break it down.
A hazard is anything with the potential to cause harm. Think of it as the thing itself: an unguarded machine, a slippery floor, or a toxic chemical.
A risk is the chance of that hazard actually hurting someone, combined with how bad the injury could be. The slippery floor is the hazard; the high likelihood of a worker falling and breaking their arm is the risk.
Getting this right is the foundation of a solid assessment. You identify hazards first so you can properly analyse and control the risks before they turn into an incident. This distinction is absolutely fundamental to filling out your risk assessment plan correctly.
Can I Use the Same Risk Assessment Template for All Subcontractors?
Yes and no. You can, and should, use the same base template for consistency. It keeps things organised.
However, the content you put into that template must be tailored to each subcontractor's specific tasks. A concrete pumper faces a completely different set of dangers than an electrician, and your plan has to reflect that reality. The template provides the framework, but the substance has to be specific to the work being done.
Who Should Be Involved in Completing the Risk Assessment?
A risk assessment should never be a solo mission. While a Health and Safety Manager or Site Supervisor usually leads the charge, it’s absolutely critical to involve the workers who are actually doing the job.
These are the people with firsthand, on-the-ground knowledge of the real hazards. They’ll tell you if a proposed control measure is practical or just a nice idea that won’t work in the real world. Involving them also creates a sense of ownership, making them far more likely to stick to the plan. A collaborative assessment is always more effective than one cooked up in an office.
Trying to manage all this with spreadsheets and endless paperwork is a nightmare, especially when you're juggling multiple sites. Safety Space brings everything together, letting you upload your plans, assign actions, and track progress in real-time. It makes accountability clear and compliance a whole lot simpler. Book a free demo to see how it works.
Ready to Transform Your Safety Management?
Discover how Safety Space can help you implement the strategies discussed in this article.
Explore Safety Space FeaturesRelated Topics
Safety Space Features
Explore all the AI-powered features that make Safety Space the complete workplace safety solution.
Articles & Resources
Explore our complete collection of workplace safety articles, tools, and resources.